EXAMPLES

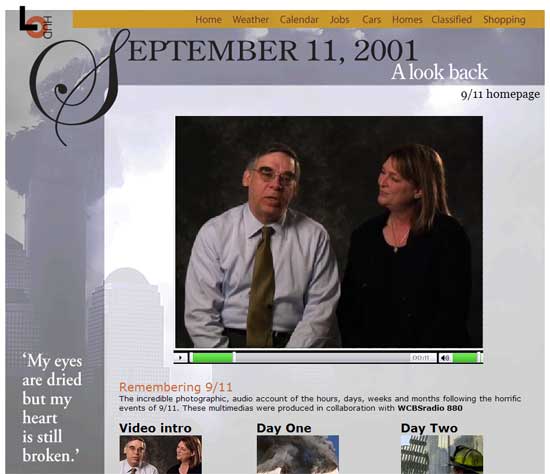
"Voices of 9/11"
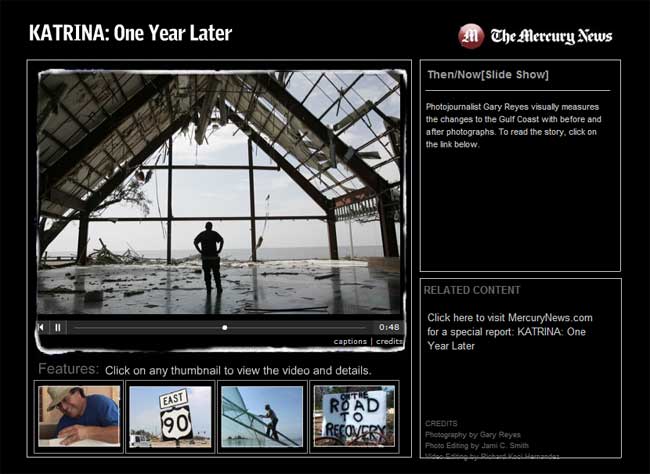
"Four Years Later: A 9-11 Commemoration"
Martin Fuchs' tutorial: Building a multimedia slide show with Soundslides
Charlotte.com's "Panthers vs Steelers"
"Benton Franklin Fair and Rodeo 2006" from tri-cityherald.com
Soundslides is a program that produces simple audio slide shows, is quick to learn, and is rapidly becoming the software of choice for news organizations creating an online presence. Even better, it is inexpensive ($40) and works on both Macs and PCs.
Here's the home page for the program.
Once you've got the program open, the best way to learn how to make a Soundslide is to follow developer Joe Weiss' Quickstart directions, to which I've added some screen shots, some notes, and some added instructions below.
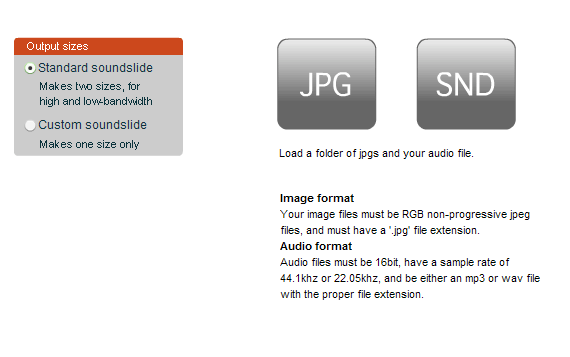
Your image files must be RGB jpeg files, and must have a ”.jpg” file extension. Audio files must be 16bit, have a sample rate of 44.1khz or 22.05khz, and be either an MP3 or aiff (Macintosh) or wav (PC) with the proper file extension.
-
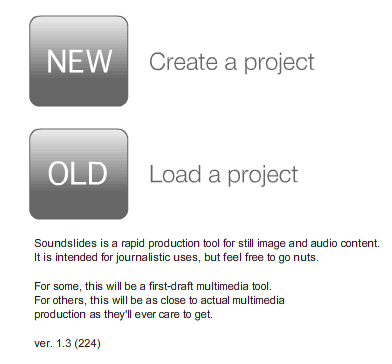
Click the “NEW” button, and save the project to your computer.
-
Click the “JPG” button, and select a folder of .jpg files to import
from your hard drive.
-
Click the “SND” button, and select an .mp3 or .aiff/.wav file from your
hard drive.
-
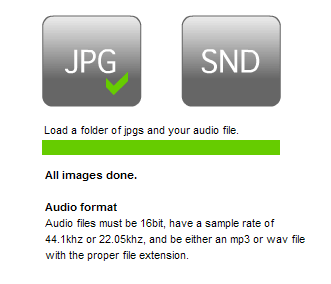
The main editing interface should open after the audio and images are imported.
Both the audio and the images have to be imported before the editing window will appear. NOTE: "Blank" recordings will work. They must be prepared ahead of time. If you have a recorder in your computer, that works well.
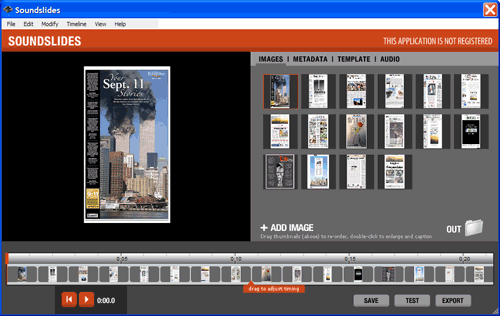
In the editing interface, you can click:
SAVE will save the project so you can open the project folder later.
TEST will launch your project in your computer’s default web browser. (NOTE: On the PC, my best luck was with simply clicking the play button -- the one in a burgundy color with the > arrow on it.)
EXPORT will open a folder in your finder, and will show the final output files.
To change the image timing points, drag the time marks between the images in the lower timeline.
To change the order of the images, drag and drop the thumbnails in the upper right lightbox area.
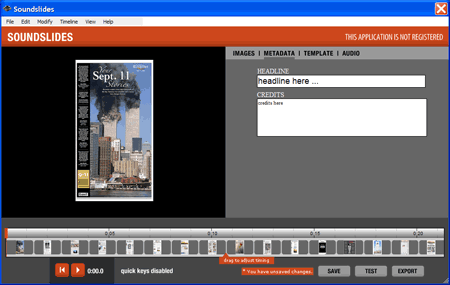
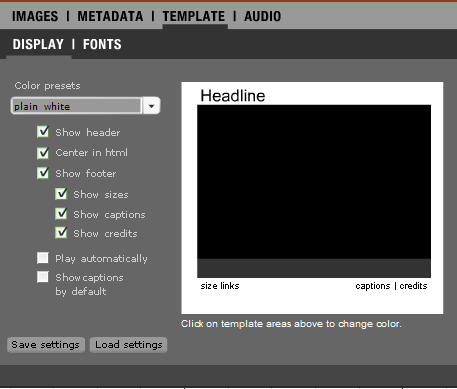
To edit the headline and credits, click on the “METADATA” tab.
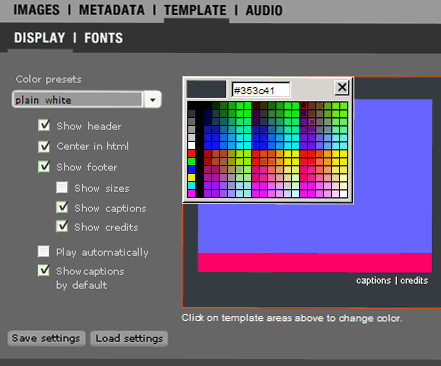
To edit the colors and design options, click on the “TEMPLATE” tab.
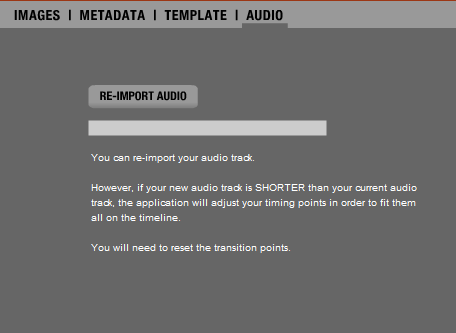
To re-import your audio file, click on the “AUDIO” tab.
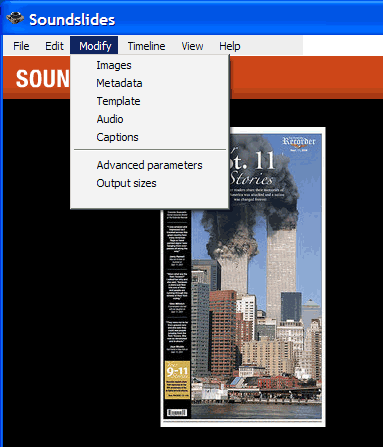
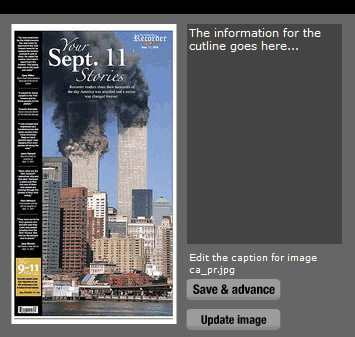
To create cutlines (captions), there are two options. Double click on the picture you want to write for, or go to the menu bar to MODIFY and select CAPTIONS.
To change colors, go to the TEMPLATE tab. Remember to CLICK on where you want to change the color. This works for the headline, background areas, etc. A color palette will pop up for each one. I had to click hard after I made my selection and it didn't always take on the first try. This may just be my computer, however.
*************
Basic Soundslide presentation:
Soundslides packages: