Making a Crook for a Natural Horn
John Ericson
When I was a Doctoral student at Indiana University I was able to create a special minor for my program, a minor in the area of brass instrument design and construction. As a part of that minor I made a natural horn with the help of natural horn soloist, teacher, and maker Richard Seraphinoff.
Several years later I decided to purchase a horn from Rick as well, an large instrument made to mid-nineteenth century dimensions with a detachable rotary valve section. As I had experience working with Rick and had built by then five crooks with his help, this instrument he supplied with three of the crooks as “kits,” E, A-flat, and A. I am sure this is not his normal practice, but I was grateful to him for accommodating me in this manner. While I built the E crook pretty much right away and built the A-flat crook a few years ago, this summer (2008) I decided to build the A crook and document the process.
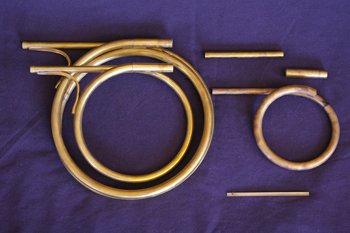
To begin we have the A crook in parts along with the finished A-flat and E crooks. For these three I used an unusual brace from my parts box that at a distance looks like the braces Rick used, but close up is of a unique design. More on that in a moment.
Getting the parts to this point obviously took some effort from Rick. The biggest work was drawing the tubing over a mandrel, annealing the tube, filling it with pitch, bending the tube, removing the pitch, and annealing the finished part. The male receiver also required careful machine work.
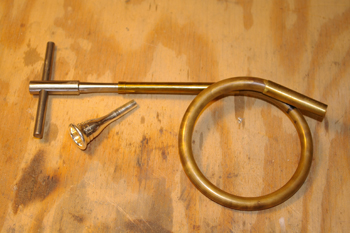
The first step is to assemble the crook roughly and see where you are in terms of pitch. It was intentionally shipped too long so that there would be room to adjust as needed. Note the special tool for making the mouthpiece inlet. I have quite a lot of brass repair tools and actually did some repair in Nashville for others but have since then have mostly only worked on my own horns, with occasional work for students or colleagues.
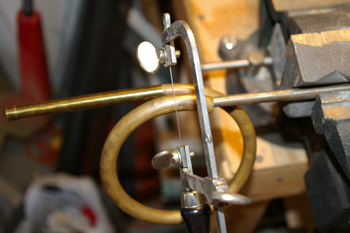
Next, with the pitch figured out roughly the excess tube is cut off with a jewelers saw.
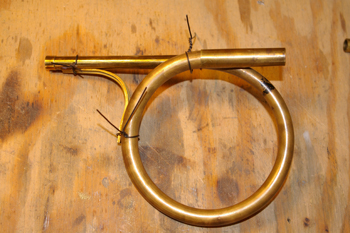
Now we assemble the crook and wire it for soldering.
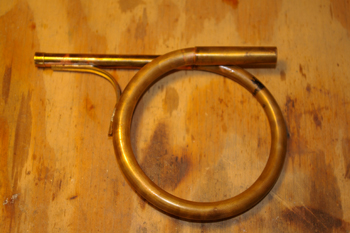
Next the parts are all soldered together, and the wires cut off. We have a crook now that is quite usable but not finished.
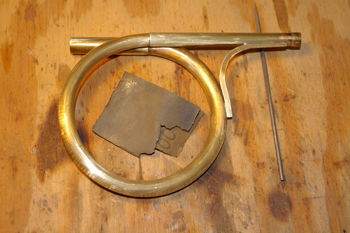
The next step is clean up and sanding. A file and sandpaper are used to clean up the solder and the entire part is also sanded lightly with 400 grit sandpaper to prepare it for buffing. Actually, Rick would normally buff the parts before assembly and rebuff affected areas after assembly, but I felt more comfortable doing it only with the part securely assembled.
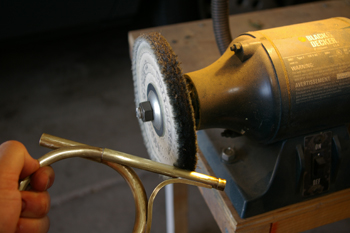
With everything prepped it is time for buffing. I set up one end of a bench grinder with a cotton buffing wheel and used white buffing compound. Wear safety glasses and work slowly. I would not recommend this step to the inexperienced. It is very possible to lose the part in the wheel and do damage to the part and to yourself if you do not know what you are doing. This step and the previous step are dirty jobs that really make or break the finish of the crook. I have immense respect for craftsmen who make new instruments for sale; to get a perfect finish takes much care and skill. I have been told that the craftsmen who do buffing for instrument makers are among the best paid, for good reason.
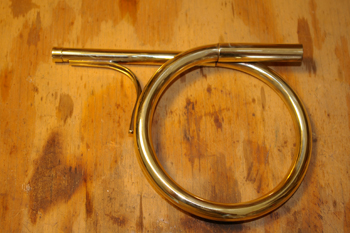
The finished crook! It is quite shiny! The hard to reach spots were buffed with a small wheel on a Dremel motor tool.
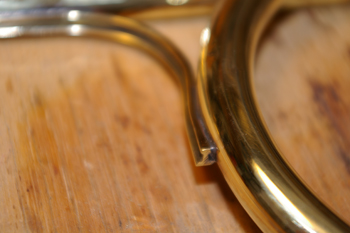
Finally, at the beginning of this article I mentioned the brace was of a distinct design. Look closely at the end of the brace; it is actually an old piece of brass O-gauge rail that had originally been used as the point rail from a turnout. These were in my part box and of the right size and shape for making braces. It makes the three crooks I made for this horn stand out subtly from the crowd.
For more information visit The Natural Horn area in Horn Articles Online and be watching for a new publication by John Ericson on the natural horn from Horn Notes Edition.
Return to Horn Articles Online, the Internet horn resoruce by John Ericson